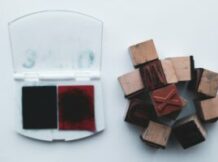
Part 11 of our 50 Uses for Rubber Stamps series brings a great idea for creating your own custom DIY phone case!
49 – DIY Phone Case
Here are the 4 simple steps to creating your own custom phone case.
Supplies
- Your phone
- A clear phone case
- A piece of paper
- a pencil
- scissors
Step 1: Cut the paper to fit the case
You want the paper to be the correct size to fit in the case without too much extra to spare. The easiest way to do this is to take the case, lay it face down on the piece of paper, and trace the shape of the case. This will give you a good estimate to start with. You can trim to fit as needed.
Step 2: Trace holes for the camera and speaker
Once you have the paper cut to fit, you need to cut out the holes for the camera and speaker. Simply place the paper in the case and use your pencil to trace the speaker and camera holes onto the paper. Cutout these holes and double check to make sure they are lined up correctly.
Step 3: Decorate your new case
This is the fun part! Take your new custom rubber stamp and go to town. No more being limited by the imagination of commercial case designers. Create a one-of-a-kind case that fits your personal style.
Step 4: Assemble your custom phone case
It’s time to put all the pieces together. Put the paper in the case and snap your phone into place. Now you’ve got a custom case that can’t be found on any store shelf.
Step 5: Add some variety
Why stop at one pattern? Use your first design as a template to create more. Take the paper out of the, trace it as many times as you like and rather than one custom case you’ve now got unlimited designs all for the price of one! Want a different colored case to match every outfit? No problem, just trace a new pattern. Change your mind about a style choice? Just create a new style. Unlimited style at minimal cost!
Need some help figuring out which stamp matches your specific needs? Give us a call at 1 (850) 7STAMPS or visit us online. Our team is here to assist in any way we can.


